


If you love the bold, savory flavors of an Italian sub but want something a little more fun (and low carb!), these keto Italian sub roll-ups are about to become your new obsession. Picture this: layers of genoa salami, pepperoni, ham, and provolone cheese, rolled up with juicy tomato, crisp red onion, and a sprinkle of oregano. It's like your favorite deli sandwich went bite-sized!

This post may contain affiliate links.
When I first started experimenting with keto-friendly snacks, I knew I wanted to create something that captured all the flavors of my favorite Italian sub without the bread. Enter these roll ups! They came together almost by accident during a "clean out the fridge" moment, and after one bite, I knew I had to share them. The combination of salty deli meats, creamy provolone, and fresh veggies is so satisfying-and the best part? No cooking required!
Quick and easy snacks like this have become a lifesaver in my busy life. Whether I'm juggling work, family, or just trying to stay on track with my keto goals, I always turn to recipes that don't demand a ton of time or effort. These roll ups are simple, but they check all the boxes: flavorful, filling, and easy to prep ahead. You can make them the night before and pull them out when hunger strikes, no stress involved.
I also love how customizable this recipe is. Don't have provolone? Try mozzarella or Swiss. Not a fan of red onion? Skip it or swap in banana peppers for a little tangy crunch. The possibilities are endless, and that's what makes these roll ups so fun-they're as versatile as they are delicious. All right, let's get into the details so you can whip up a batch for yourself!
How to Make Keto Italian Sub Roll-Ups
Ingredients You'll Need For This Recipe
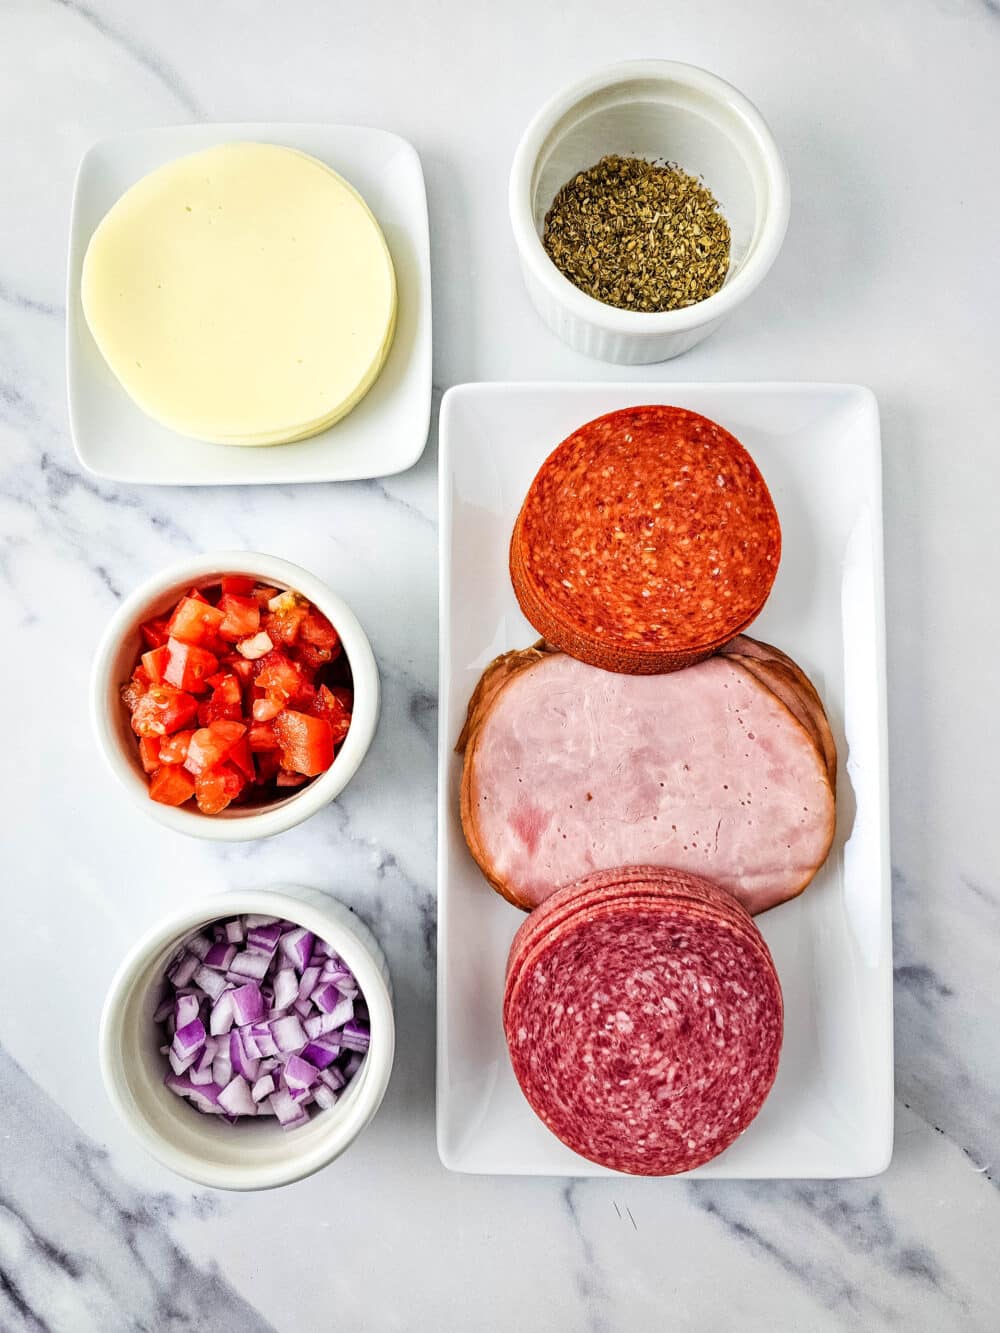
- 12 slices genoa salami
- 12 slices sandwich pepperoni
- 12 slices ham, thin sliced
- 12 slices provolone
- 2 teaspoon oregano
- 1 roma tomato, diced small
- ¼ cup red onion, diced small
Step By Step Instructions
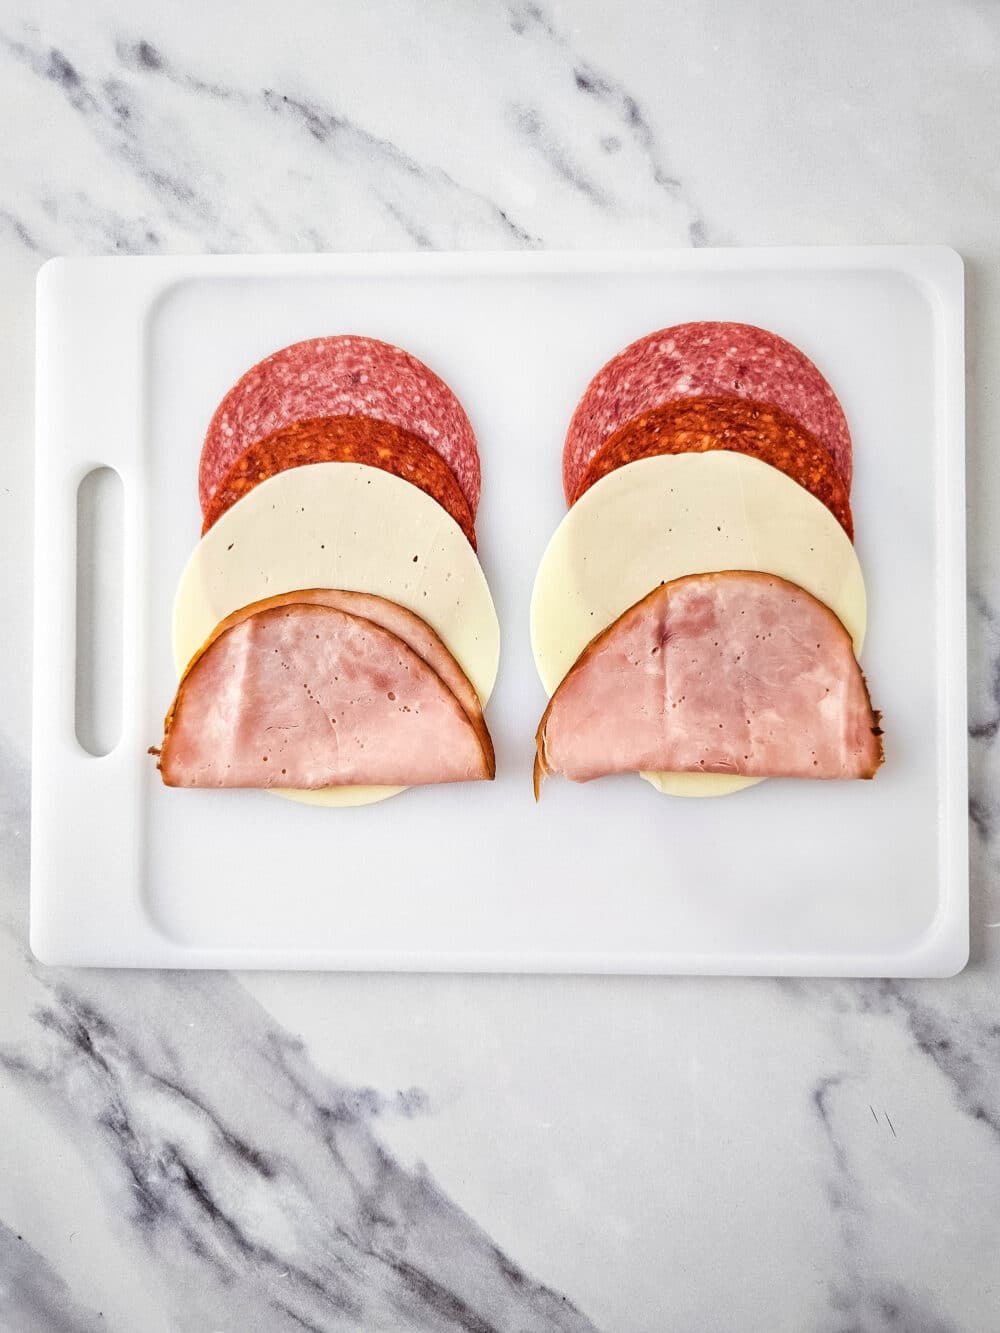
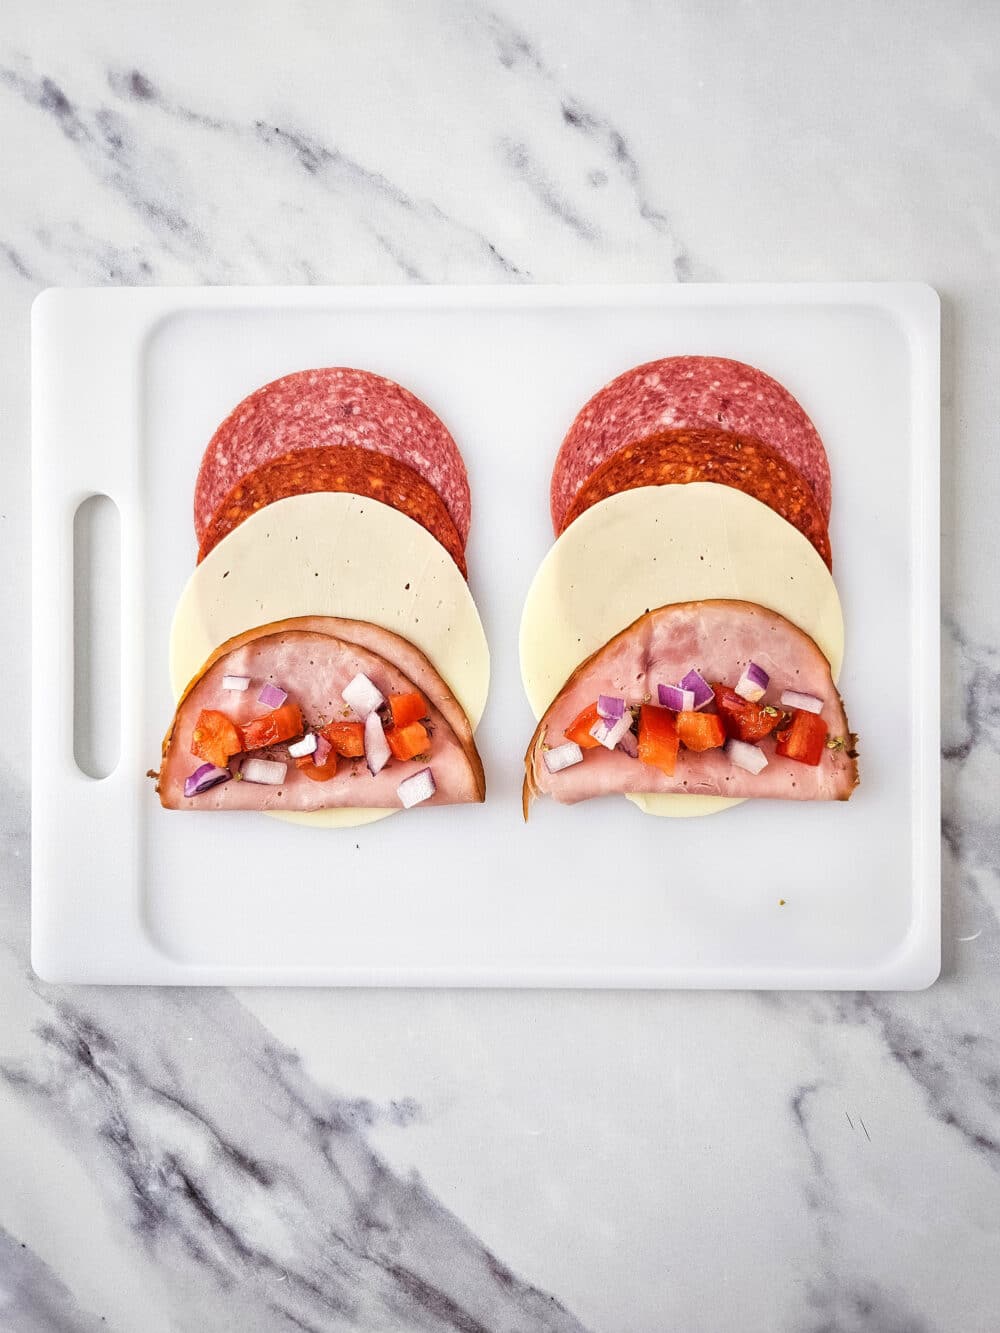
- Arrange meat and cheese in a chain going downward, on a tray or baking sheet, in the following order: salami, pepperoni, provolone, ham. Arrange about ½ inch to 1 inch apart.
Want to save this?
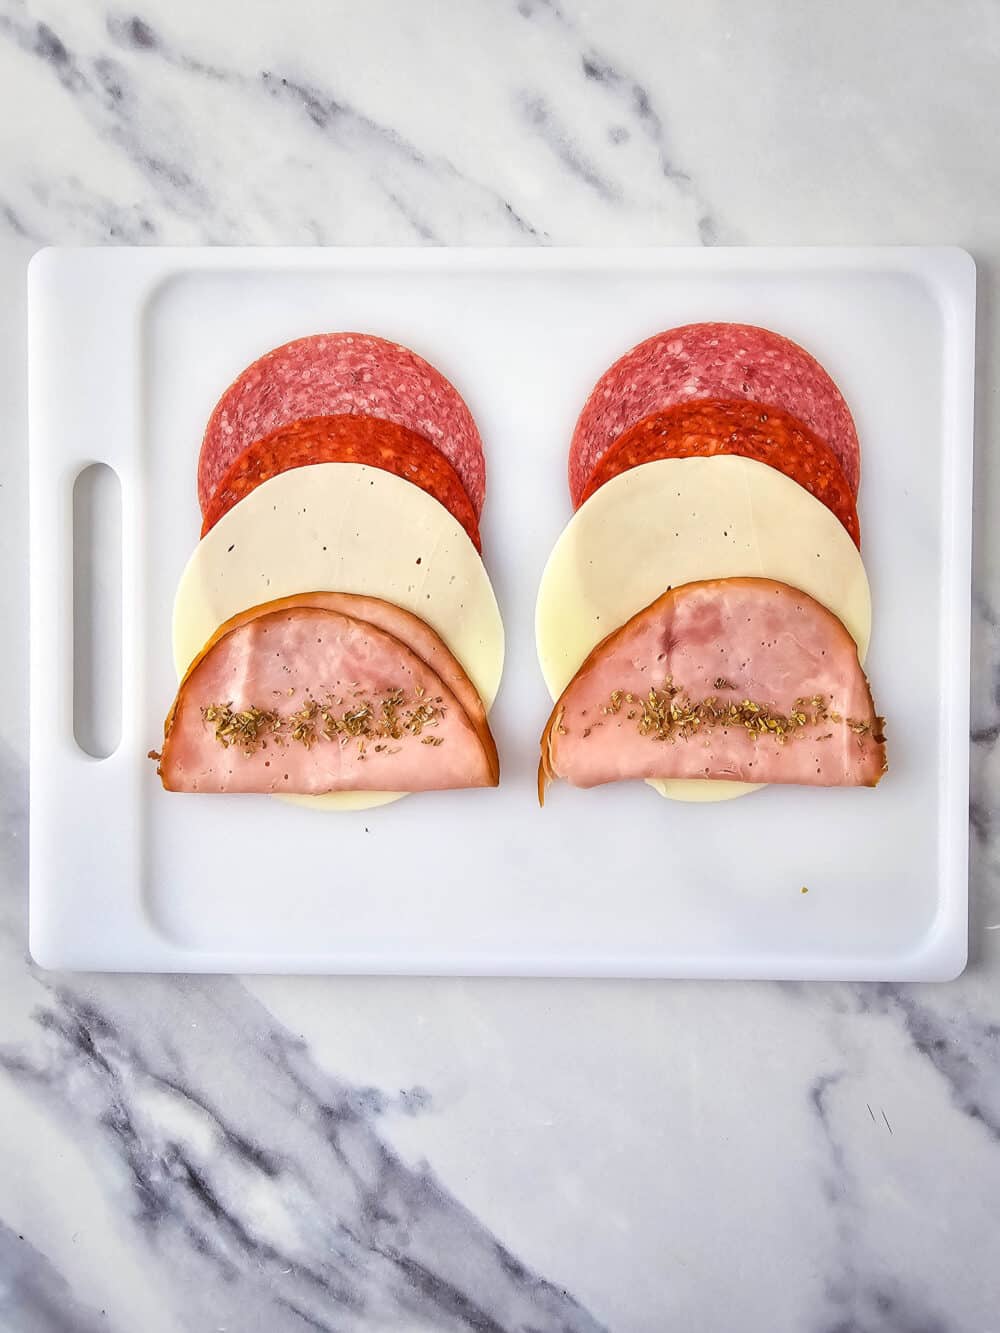
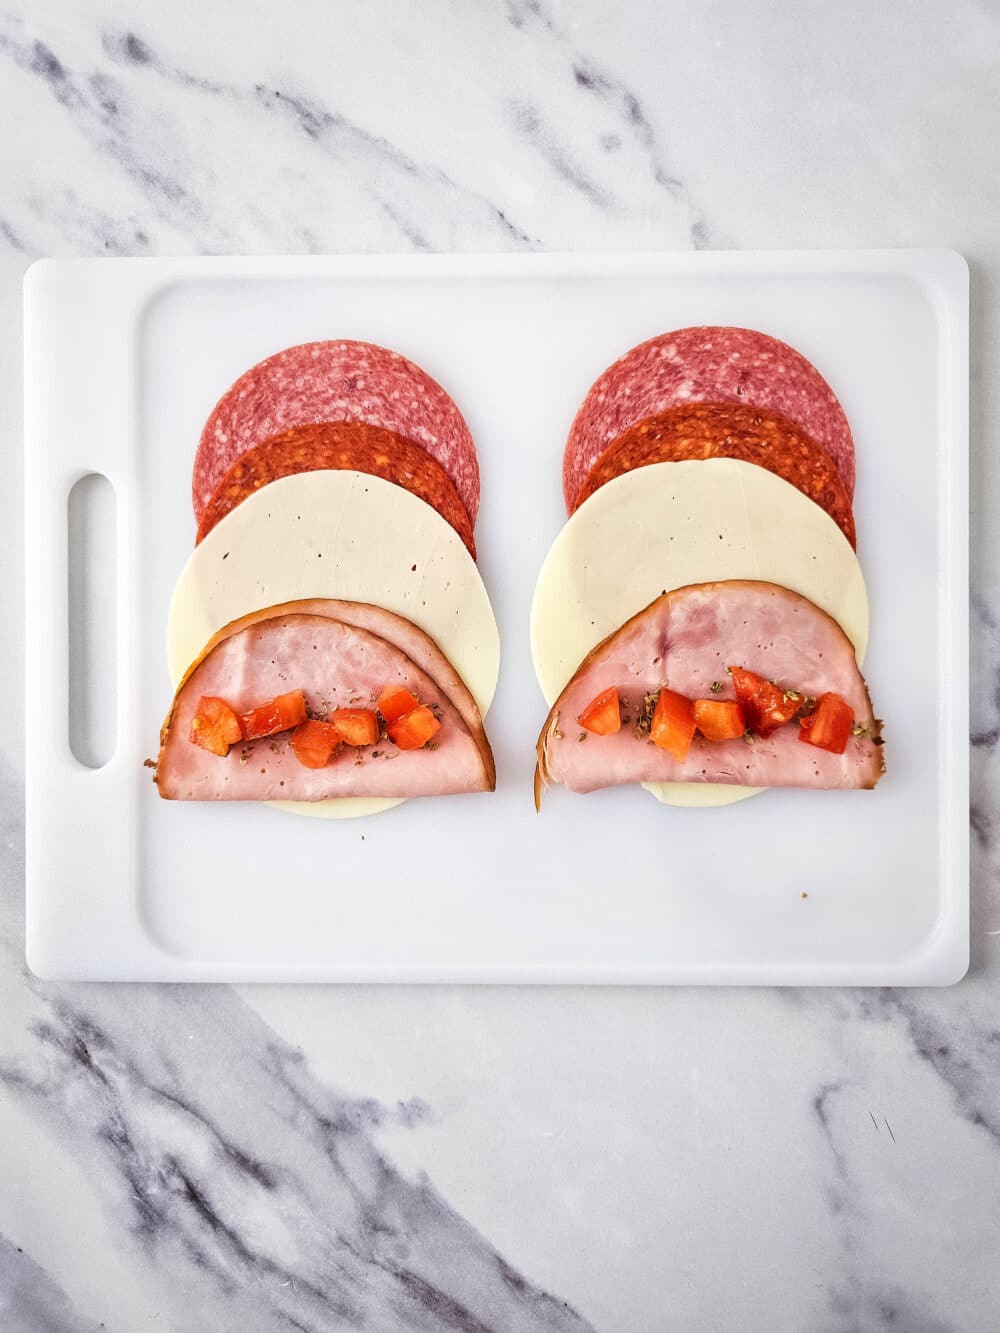
- Towards the bottom of the ham, sprinkle the oregano, then add some diced tomatoes and diced onions.
- Starting at the bottom with the ham, start rolling tightly towards the top, until you reach the top of the salami. Secure each roll with a toothpick.
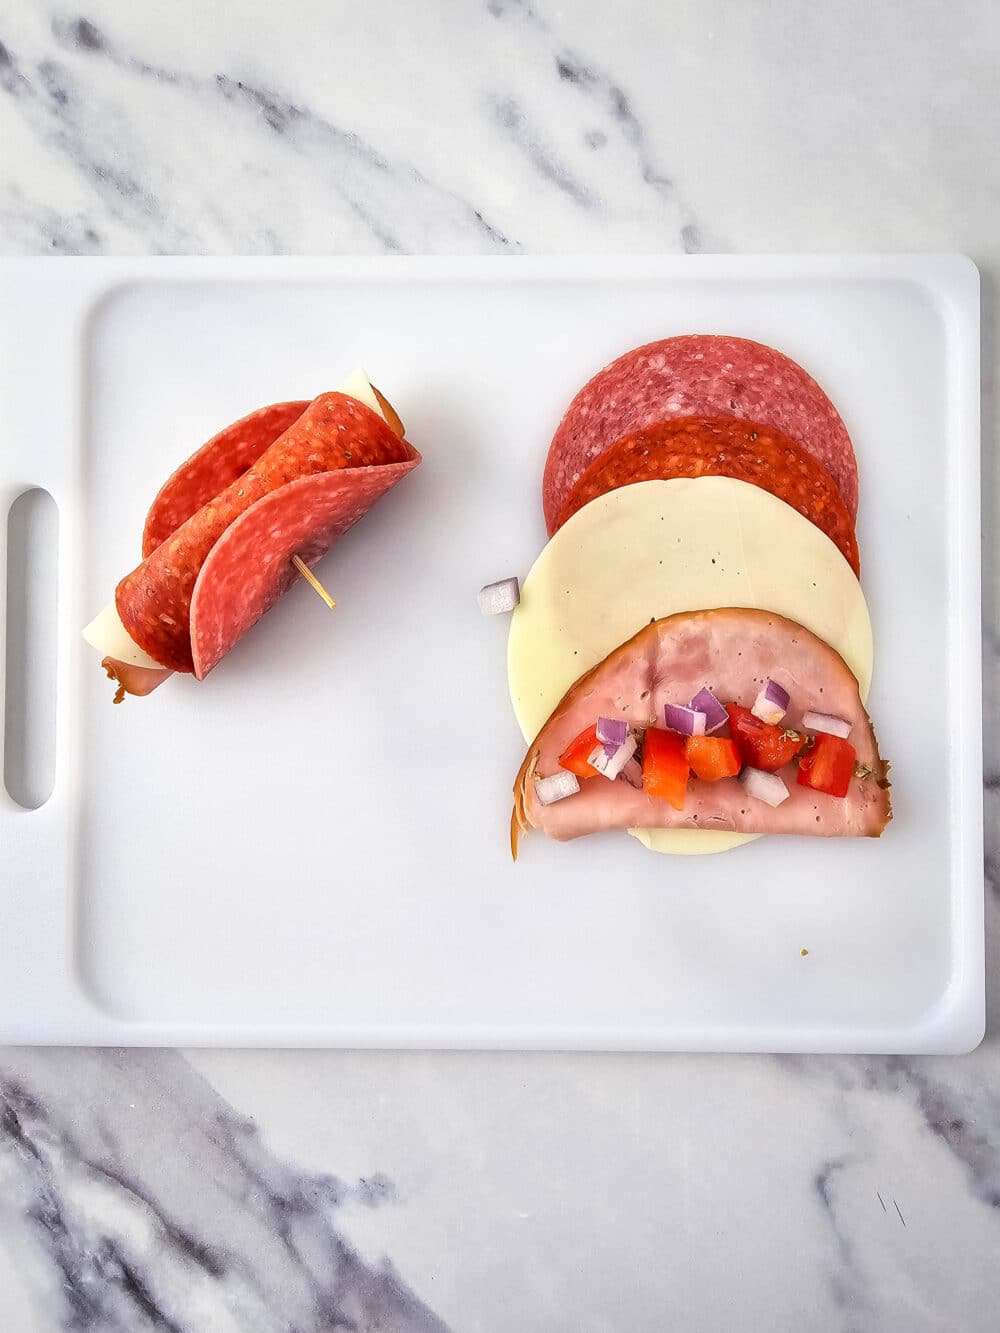
- Enjoy fresh, or cover and refrigerate until ready to serve.
Tips and Tricks
- Keep It Tight - When rolling up your layers, make sure to start at the bottom and roll as tightly as possible to keep everything secure. If your rolls are a little loose, you can use an extra toothpick or two to hold them together until serving.
- Prep Ahead - These roll ups are great for meal prep! Assemble them the night before, cover them tightly with plastic wrap, and store them in the fridge. This allows the flavors to meld together for an even tastier bite the next day.
- Customize Your Fillings - Get creative with your ingredients! Swap out meats, cheeses, or veggies based on what you have on hand or your personal preferences. For a little extra kick, add a drizzle of Italian dressing or a sprinkle of red pepper flakes before rolling.
If you loved this keto snack, you'll enjoy these other recipes:
- 25 Genius Quick & Easy 2-Minute Keto Snacks Ideas
- Keto Chicken Bacon Ranch Bites
- Air Fryer Crispy Carnivore Cream Cheese Bites
- Keto Pepperoni Cream Cheese Bites
PIN FOR LATER!

Recipe

Keto Italian Sub Roll-Ups
Ingredients
- 12 slices genoa salami
- 12 slices sandwich pepperoni
- 12 slices ham thin sliced
- 12 slices provolone
- 2 teaspoon oregano
- 1 roma tomato diced small
- ¼ cup red onion diced small
Instructions
- Arrange meat and cheese in a chain going downward, on a tray or baking sheet, in the following order: salami, pepperoni, provolone, ham. Arrange about ½ inch to 1 inch apart.
- Towards the bottom of the ham, sprinkle the oregano, then add some diced tomatoes and diced onions.
- Starting at the bottom with the ham, start rolling tightly towards the top, until you reach the top of the salami. Secure each roll with a toothpick.
- Enjoy fresh, or cover and refrigerate until ready to serve.


Comments
No Comments