

This post may contain affiliate links.
Whether your desktop is overloaded with icons or you are just looking for some super neat tricks to beef up your organization game, these hacks will take your productivity through the roof. There have been numerous studies indicating that a messy environment can make you feel overwhelmed and buried. Plus, how bad does it look when you get one client's document mixed up with another? Whoops!
I've compiled a few simple steps that you can do TODAY to get your computer desktop organized AND keep it that way:
Jump to:
- Step 1 - Clear your desktop of icons
- Step 2 - Set up your taskbar
- Step 3 - Pin your most used documents
- Step 4 - Pin your most used folders
- Optional Step - Pin to your start menu
- Optional Step - Get Dropbox
- Step 5 - Set up your folder hierarchy system
- Step 6 - Use a naming convention for your files
- Step 7 - Section your desktop
- Optional Step - Clear icons from clock area
- Comments
Step 1 - Clear your desktop of icons
First, let's clear some space on that desktop.
- Create a folder in your Documents labeled "Desktop."

- Highlight all your icons from your actual desktop and drag into that folder you just created.


It's okay to just dump them in there. We will sort them out later. Chances are you will only need a few after we're finished.
Step 2 - Set up your taskbar
This is your secret weapon to keeping a clear desktop. Think of the 10-15 programs you use on a daily basis. Those might be Google Chrome, Outlook, Adobe Acrobat, Word, Excel, Calculator, Label Maker, Snipping Tool, and QuickBooks. You may even have a proprietary software you use for your job like a CRM.
- Pin your programs to your taskbar. Open each program, right click on it while it's open on your taskbar, and click "Pin to taskbar."

- Arrange the icons by dragging in the order you usually open them each day.

Step 3 - Pin your most used documents
Once your programs are all pinned to your taskbar, now it's time to start pinning your documents to the taskbar too. This may sound advanced. Trust me if you can pin on Pinterest, you can pin a document to a program.
- Go back to that folder we created in your Documents labeled "Desktop."
- Find your most used documents and drag them on top of the taskbar to their corresponding program.
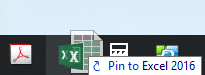
For example, let's say you have an Excel spreadsheet you use for keeping track of bills. That one should definitely be pinned! Drag your spreadsheet on top of the Excel icon on your taskbar. Now, do that for all your important documents for Word, Excel, Adobe, etc.
Step 4 - Pin your most used folders
Guess what? You don't have to stop at documents. You can also pin entire folders!
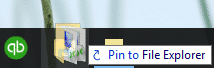
- First, pin Windows File Explorer to your taskbar. Open any folder. Any folder at all! Right click and select "Pin to taskbar."

- Next, pin all your most used folders to Windows File Explorer. Same deal, just drag the folder on top of the Windows File Explorer icon.

And boom, you have no use for messy documents and folders on your desktop anymore. They are all stored neatly on your taskbar. Now, doesn't that look better?
Those documents you use the least? Leave them in that "Desktop" folder you made in the Documents folder and pin that folder to Windows File Explorer. You probably won't go there as often now that you have your fantastic taskbar set up!
Optional Step - Pin to your start menu
You can only pin twelve items to each program on the taskbar. So if you need to, you can pin applications to your Start Menu instead. With the tiles feature on Windows 10, your Start Menu can be as big or little as you like.
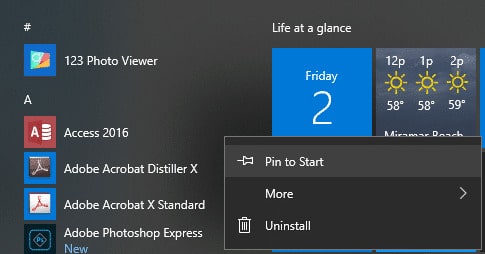
Just like pinning on the taskbar, right click on the program and select "Pin to Start." You can find all your applications on the right hand side of the Start Menu.
Unfortunately, you can only pin apps directly into the Start Menu tiles. If you have too many important documents, you can always pin a folder containing the documents to Windows File Explorer instead.
Optional Step - Get Dropbox
If you want to really step up your tech game, get Dropbox for personal or business use. Or some sort of cloud-based document storage system. You can access your documents from anywhere.
Imagine your grandmother emailing you an old recipe. Wouldn't it be nice to view this recipe on your phone in the kitchen? With Dropbox, you can! Easily drag that email attachment to your Dropbox folder on your computer. Then, open the mobile app on your phone and voila! Grandma's recipe is waiting for you in your Dropbox.
Want to save this?
It's also great for storing and sharing photos with family members if you don't want to post them on social media. The goal is to have as little as possible on your physical computer so if there is a catastrophic event, you'll still have all your files there ready to pull up at a moment's notice.
Step 5 - Set up your folder hierarchy system
Whether you choose to use Dropbox or just store documents on your computer or an external drive, you need a folder hierarchy system. What is a folder hierarchy system? Think of a physical filing cabinet. Each filing cabinet has drawers and each of those drawers has folders. Each of those folders may have subfolders and so on. Your computer has the same type of filing system. Just digital!
Group by category
To develop your folder hierarchy system, you'll need to think of categories. Two obvious categories would be business and personal because they shouldn't be mixed.
Here are some main category suggestions for business use:
- Departments
- Products
- Users
- Clients
And, here are some for personal use:
- Documents
- Photos
- Music
- Projects
Group by date
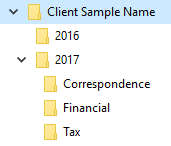
Once you have the main categories set up, set up subfolders underneath these folders sorted by year. You can also set up even more subfolders and sort by month.
Tip: Instead of Jan, Feb, Mar, use 01 Jan, 02 Feb, 03 Mar so the folders will sort properly.
Set up templates
This will be the key to keeping your folder hierarchy intact. Once you have committed to your folder hierarchy system, create empty folders as a template so you can remain consistent. For example, if folders are sorted by client name, you'll want to use the same subfolder underneath each client.
Whatever folder hierarchy you choose, start creating these folders & subfolders then stick with it. Remember you can always pin your most important folders to Windows File Explorer. Don't be afraid to use several levels of folders either. This will help quickly and easily narrow down your search.
Step 6 - Use a naming convention for your files
Once you are comfortable with your folder hierarchy system, it's time start using a naming convention for your files. You don't have to go back and rename all your files. Just going forward, follow these simple rules and your file searches will be much faster and logical.
- Avoid vague names like "notes" or "document1"
- Use YYYYMMDD or YYMMDD at the beginning of each file to make sure all your files stay in chronological order
- Use short and meaningful titles such as 20171231_Tax Return
- Avoid special characters
- Add a version number to the end of your document name if you want to save multiple versions (i.e. _V01, _V02)
- Don't use abbreviations that are weird or you won't remember later
- Use person's last name first
- Be consistent
Search Tip: Use a wildcard. That's a fancy name for putting an asterisk in front of your search term. This will help find all relevant terms to your search. For example, if you want to find all your picture files, do a search for *.jpg and it will pop up every JPEG picture you have on your computer no matter what name. Smart, huh?
Step 7 - Section your desktop
Back to your actual desktop. Now you might not be able to have absolutely no icons on your desktop, but it is highly encouraged. If this is the case, opt for a sectioned desktop.
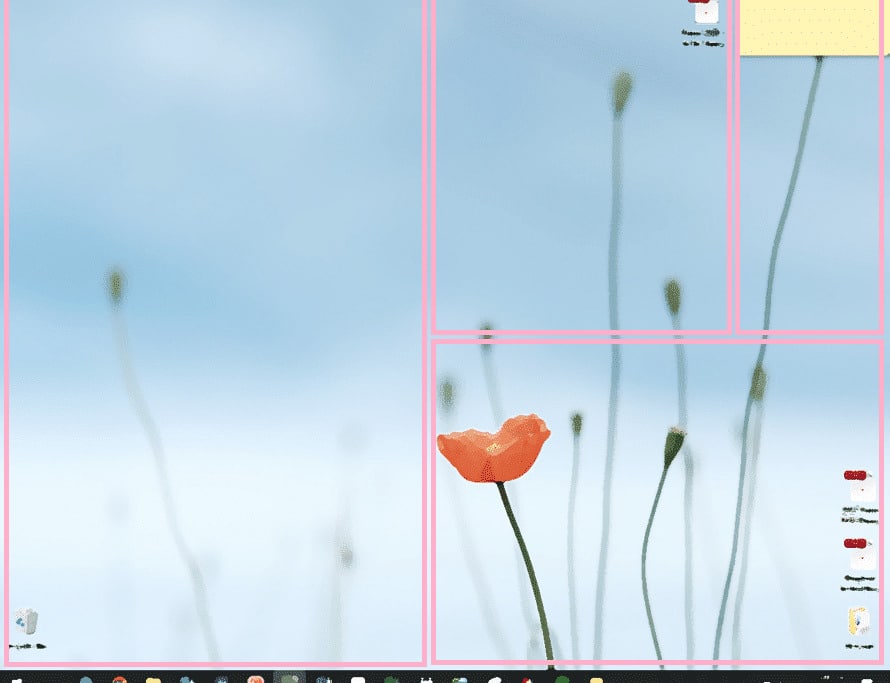
- The first section is dedicated to current items that will soon be deleted once you're done adding them to an email or combining into one PDF document.
- The middle top section is for pending items. Perhaps you are waiting for approval or a signature before you can move on.
- Sticky notes are in the top right hand corner to easily jot down a few to-do list items or a phone number.
- The bottom right hand corner is dedicated to permanent files. These are files that you might drag into emails multiple times a day. You may use this area for a special projects folder or a live research notes document that you update multiple times a day. Only use a few icons here if at all.
Some people might recommend using an app called Fences, software that organizes your desktop into sections automatically. But I am wary of third party software that might augment my operating system files. If you want a similar look and feel like that app, get a sectioned desktop wallpaper and organize your icons manually.
Optional Step - Clear icons from clock area
If you really want to completely clear your computer desktop of distractions, make sure to disable unnecessary apps in your clock area. Some of these apps are running in the background for easier access but Windows tends to put every single app in there by default. You'll also speed up your computer's boot up time by reducing the number of apps in this area.
- In Windows 10, right click on your taskbar and select Task Manager
- Select the Startup tab
- Right click on the apps you don't think you'll need and disable them
The next time you start Windows, they won't be in the clock area and you'll be free of those extra distractions.
And, there you have it! Have something to add? Leave a comment below with your desktop organization tips.